Garden Drip Irrigation Kit Tested Review for Raised Beds and Containers (2026)
Hands-on buying guide comparing setup, fittings, emitters, leaks, and timer compatibility for raised beds and patio pots.
A garden drip irrigation kit sounds like one of those “buy it once and stop thinking about watering” things. It isn’t. Not quite. We’ve run drip in raised beds, half-barrel planters, grow bags, and a dumb little row of patio pots that always dries out faster than it should. The kit matters, but the layout matters more — and the fittings matter most when you’re standing there at 6:40 a.m. with water spraying out of a barbed tee onto your socks.
We tested these kits with the same kind of setup most backyard gardeners actually have: raised beds, containers, one hose bib, a cheap-to-decent garden hose timer, and plants that don’t care about your schedule. Tomatoes. Peppers. Basil. Cucumbers. A few overwintered herbs in pots. We’re in Zone 6b, and July here is not polite.
If you’re trying to pick a garden drip irrigation kit for raised beds or patio containers, here’s what I’d buy, what I’d skip, and where the “automatic” stuff is actually useful instead of just another plastic thing in the shed.
The garden drip irrigation kit I’d buy first
For a normal raised-bed kitchen garden, I’d start with the Rain Bird GRDNERKIT Drip Irrigation Gardener’s Drip Kit.
Not because it’s perfect. It isn’t. But it gave us the least annoying balance of fittings, tubing behavior, and layout flexibility for beds where the plants change from spring peas to summer tomatoes to fall greens. Rain Bird parts are also easy to replace at hardware stores near us, which matters when a rabbit chews 1/4” line on a Sunday evening.
The Raindrip R560DP Automatic Watering Kit is the one I’d consider if you want a more self-contained “get water to containers without building a whole irrigation system” setup. It’s more beginner-friendly in spirit, especially for patio pots. The disadvantage is that I found it less satisfying for bigger raised-bed layouts where you want to split zones or run longer lines cleanly.
For tiny patios, balconies, or gardeners who don’t want to touch hose threads at all, the Smart Modular Planter with App Control and Automatic Water Cycling (MP1) is a different animal. It’s not a classic hose-fed garden drip irrigation kit. It’s more like a contained planter system with app control and automatic water cycling. Handy? Yes, for the right person. The downside is obvious: you’re buying into a planter system, not just irrigation parts you can move around the yard.
And if you’re already using that MP1 planter, the Solar System with Panel and Battery(Suitable for MP1) and LED Growing Light system (Suitable for MP1) make more sense as add-ons than standalone purchases. I’ll get into where they fit below.
How we tested these kits without babying them
We set up the kits the way we’d set them up for our own food garden.
No showroom bench. No perfect straight tubing on a white table. We ran lines through mulch, around tomato cages, over bed edges, and into pots that get moved every time somebody decides the patio “needs more space.” Real garden nonsense.
The main test area was:
- Two 4’ x 8’ raised beds with tomatoes, peppers, basil, and zinnias tucked in because I can’t help myself
- One 3’ x 6’ bed with lettuce, parsley, and scallions
- Eight containers ranging from 5-gallon grow bags to 18” patio pots
- One hose bib with a timer
- A basic inline filter and pressure reducer when the setup called for it
- Mulch over most lines after the first leak check
We paid special attention to four things because they’re the parts that make people rip drip irrigation back out:
- Fittings that leak or pop off
- Emitters that clog, blast, or water the wrong spot
- Tubing that kinks when it gets hot
- Whether the kit plays nicely with a garden hose timer
That last one matters. A drip kit without a timer still saves water, but it doesn’t save your morning. If you want the bigger layout basics before buying parts, I’ve got more notes in our drip irrigation techniques guide. The short version: don’t design drip around the fantasy garden in your head. Design it around where your hose bib is and where you actually walk.
Raised beds are where the Rain Bird kit felt strongest
The Rain Bird GRDNERKIT was the kit I’d hand to someone with two to four raised beds and say, “Start here, then add pieces later.”
The advantage is layout flexibility. Raised beds are awkward because you usually need a main line, smaller feeder lines, and a way to change the planting pattern every year. Tomatoes one year, garlic the next. Bush beans where the cucumbers were. That kind of thing.
Rain Bird-style drip parts tend to make that easier because you can build a simple backbone and run smaller lines to individual plants or rows. I prefer that over trying to snake one long spaghetti loop around every stem. We tried that in 2018. Awful. Every time we harvested basil, we caught a loop with the scissors.
The fittings on the Rain Bird kit were the most confidence-inspiring of the classic kits we tested. Not magic. You still need to push barbed fittings all the way in. But once seated, they held well after a few pressure cycles.
Here’s the trick we use: put the end of the 1/4” tubing in a mug of hot tap water for 20–30 seconds before inserting barbed fittings. Not boiling water. Just hot. It softens the line enough that you can seat the fitting fully without shredding your thumb. I learned that after a spring Saturday where my hands looked like I’d been sorting roofing nails.
The disadvantage of the Rain Bird kit is that it still expects you to think. If you’ve never built drip before, the bag of parts can feel like a drawer full of black plastic guesses. You’ll probably dry-fit the layout, change your mind, and redo two lines. That’s normal.
I’d buy it again for raised beds.
The Raindrip R560DP is friendlier for containers, but not my favorite for big beds
The Raindrip R560DP Automatic Watering Kit makes more sense for the gardener who says, “I have ten pots and I keep forgetting the basil.”
Been there. Container basil is dramatic. Miss one hot afternoon and it looks like a green tissue.
Raindrip’s biggest advantage is that it’s sold as an automatic watering kit, so the whole idea is container and convenience focused. That’s the right mental model for patio watering. You’re not necessarily building a permanent irrigation grid. You’re trying to keep pots alive during workdays, vacations, and heat waves.
Where it worked well for us:
- Patio pots near a hose bib
- Herbs in separate containers
- A small pepper collection in 7-gallon grow bags
- Situations where we didn’t want to run a thick mainline through a bed
Where I liked it less:
- Larger raised beds
- Mixed crops with very different water needs
- Long runs with multiple branches
- Layouts where I wanted clean, repairable zones
The fittings were fine when seated correctly, but we had a couple of weepers during the first test. Not dramatic leaks. More like annoying little beads of water at the connection point. I don’t ignore those anymore. A tiny leak at 7 a.m. becomes a muddy trench by dinner if your timer runs daily.
The fix was the same as usual: cut the tubing square, push the barb in fully, and don’t reuse stretched tubing ends if you can help it. If a fitting has been pulled out once, I cut off 1/2” of tubing before reattaching. Maybe wasteful. But cheaper than watering the patio slab.
If your garden is mostly containers, the Raindrip kit is a sensible buy. If your garden is mostly raised beds, I’d still choose Rain Bird first.
A garden drip irrigation kit still needs a timer — usually
A lot of kits say “automatic” somewhere in the name or listing. Read carefully. Sometimes that means it includes a timer. Sometimes it means it can be connected to one. Sometimes it means the seller is being optimistic.
So: check the current listing before you buy.
We tested with hose-end timers because that’s what most gardeners use. I’ve used an Orbit B-hyve hose timer, a basic Melnor two-zone timer, and one old mechanical dial timer that makes a tiny ticking sound like a kitchen egg timer. The old mechanical one still works, which irritates me because the expensive smart one has needed reconnecting more than once.
For any garden drip irrigation kit, I want this setup at the hose bib:
- Hose timer
- Backflow preventer if not built in
- Filter
- Pressure reducer
- Main drip line or kit adapter
Order matters. Sort of. Manufacturers may specify their own order, so follow the kit instructions if they’re clear. But the big thing is this: drip systems hate dirty water and high pressure.
We made that mistake years ago with contractor topsoil in a new bed. The soil was bad enough — heavy, sticky, full of bits of brick — but we also skipped the filter on a drip setup because we were in a hurry. The emitters clogged by mid-June. The tomatoes looked offended.
If your water source is a rain barrel, be even more cautious. Rain barrel water can work with drip, but it needs filtration, and gravity pressure may not be enough for every kit or emitter style. Some systems behave beautifully on hose pressure and barely dribble from a barrel. Annoying, but true.
The MP1 planter is not the same thing — and that’s the point
The Smart Modular Planter with App Control and Automatic Water Cycling (MP1) belongs in this review because a lot of container gardeners are not actually looking for tubing and emitters. They’re looking for “please keep my plants watered when I forget.”
That’s different.
The MP1 is a smart modular planter with app control and automatic water cycling. So instead of connecting a garden drip irrigation kit to a hose bib and routing water through beds, you’re using a planter designed around its own watering behavior.
Where I’d use it:
- Balcony herbs
- Apartment patios
- A kitchen-adjacent salad planter
- Someone who wants app control more than DIY plumbing
- Renters who can’t attach hardware to outdoor spigots
Where I wouldn’t use it:
- A 4-bed vegetable garden
- Tomatoes in big summer containers unless the planter size fits your crop plan
- Anywhere you want cheap, expandable irrigation parts
- A garden that already has a good hose timer and drip line
The advantage is convenience and contained design. The disadvantage is lack of flexibility compared with loose drip components. With Rain Bird or Raindrip-style kits, I can move one emitter from a pepper to a cucumber in about two minutes. With a modular planter, you’re working inside that system.
That’s not bad. Just different.
I’d recommend the MP1 for people who kill herbs on patios and want a cleaner, more automated setup. I would not buy it as the main watering system for raised beds.
Solar and grow lights: useful, but only in the right little corner of the garden
The Solar System with Panel and Battery(Suitable for MP1) is one of those add-ons that either makes perfect sense or no sense at all.
If your MP1 planter is in a sunny spot without a convenient outlet, solar support is appealing. A panel and battery can make a smart planter feel less tethered. That’s nice on a patio where extension cords would be ugly or unsafe.
But don’t buy it thinking it turns a whole raised-bed drip irrigation setup into an off-grid irrigation station. It’s suitable for MP1. That’s the use case. Keep it there.
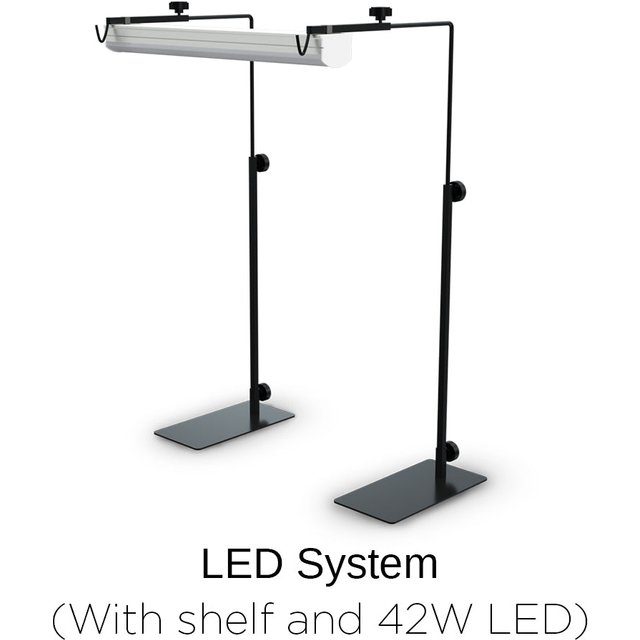
The LED Growing Light system (Suitable for MP1) is the same story. Good fit if you’re using the MP1 in a place where herbs or greens need light support. Less relevant if your plants are already outside in full sun.
We tested grow lights for seed starting for years, and I’ll say this plainly: lights only help if they’re close enough, on long enough, and matched to what you’re growing. A weak light too far above basil is just decor. I can’t speak to every indoor setup, so take this with a grain of salt. But I’d treat the MP1 light as a companion piece for that planter, not a replacement for a full seed-starting rack.
Leaks: the boring problem that decides whether you’ll hate drip irrigation
Every garden drip irrigation kit leaks if you install it carelessly. Some just forgive you more than others.
The leak points we saw most often were:
- Barbed fittings not fully seated
- Tubing cut at an angle
- End caps not secured well
- Hose-thread connections missing washers
- Lines pulled sideways by mulch, pets, or clumsy gardeners named me
The hose-thread washer thing is ridiculous, by the way. You can build a perfect drip layout and still lose water at the faucet because one rubber washer is cracked. Keep extras. They cost almost nothing and save the kind of leak that makes you accuse the entire kit of being junk.
For raised beds, I like to run the system for 10 minutes before burying or mulching anything. Then I walk every line with coffee in hand and look for dark wet spots where they shouldn’t be. Not scientific. Works.
If there’s a leak at a 1/4” barb, I don’t smear sealant on it. I cut the tubing back and reconnect. If there’s a leak at a threaded connection, I check the washer and hand-tighten. Don’t crank plastic threads with pliers unless the instructions say to. That’s how you turn a $12 problem into a whole new kit.
Rain Bird had fewer nuisance leaks in our raised-bed layout. Raindrip had a couple more at first, though they were fixable. The MP1 avoids most of this because it isn’t a traditional exposed tubing system running from a hose bib, but then you’re dealing with a smart planter instead of a garden-wide drip setup.
Pick your annoyance.
Emitters: where plant spacing gets real
Emitter choice matters more than the box photo suggests.
In raised beds, I prefer targeted emitters for bigger plants and drip line or closely spaced emitters for dense crops. A tomato wants deep, consistent water near the root zone. Lettuce wants a more even moisture pattern. A 15-gallon grow bag with a pepper in August may need more than one little drip point, especially if the potting mix has gone hydrophobic around the edges.
We learned that the hard way with fabric grow bags. The emitter was dripping nicely. The plant still wilted. When I dug into the bag, one wet column ran straight down while the rest of the mix stayed dry. Now we use two emitters for larger fabric pots, spaced a few inches apart, and we water long enough for the moisture to spread.
Not all kits make emitter changes equally painless. Rain Bird felt better for tweaking raised-bed layouts. Raindrip felt fine for container runs but less satisfying when I wanted to fuss with crop-by-crop watering.
For containers, don’t assume one emitter per pot. That works for small herbs. It may not work for a big tomato, blueberry, dwarf citrus, or 20” planter stuffed with annuals and basil. Check the soil with your finger after a full watering cycle. Not the surface. Two inches down.
And if water runs out the bottom after three minutes but the center of the pot is dry, your mix may be repelling water. Drip can’t fix bad potting mix instantly. Bottom-water the container once, rehydrate it properly, then let drip maintain it.
Timer schedules we actually used
I don’t trust one-size watering schedules. They’re usually wrong by the second hot week.
For our raised beds in summer, drip often ran early morning, somewhere between 5:30 and 7:00. Long enough to soak, not so long that the paths turned slick. During mild weather, every other day was plenty for mulched beds. During heat, daily watering sometimes made sense for containers but not always for in-ground beds.
Containers needed shorter, more frequent watering. Fabric grow bags needed the most attention. Plastic pots held moisture longer. Terracotta pots dried out fastest, which is why I love how they look and hate how they behave in July.
A garden hose timer with multiple start times helps containers. For raised beds, I’d rather run one deeper cycle than lots of tiny sips. Tiny sips grow lazy roots. Well, that’s how I think of it. The plant physiology folks can argue with me, but in the garden, shallow watering has always made our plants more fragile.
If you’re using a smart timer, check the app after storms. Weather skip features are nice until they skip when your containers under the porch never got rain. Ask me how I know.
Which kit fits which garden?
If you’ve got raised beds, buy the Rain Bird GRDNERKIT Drip Irrigation Gardener’s Drip Kit. It’s the strongest general pick here because it gives you room to adapt. The fittings behaved better for us, the layout made sense for vegetable beds, and replacement parts are easy enough to find.
If you’ve got mostly patio pots, the Raindrip R560DP Automatic Watering Kit is a good container-focused choice. It’s the one I’d use for herbs, peppers in pots, and a small patio where convenience matters more than future expansion.
If you’ve got a balcony or you want a self-contained smart planter, the Smart Modular Planter with App Control and Automatic Water Cycling (MP1) makes sense. Pair it with the Solar System with Panel and Battery(Suitable for MP1) if power access is awkward, and consider the LED Growing Light system (Suitable for MP1) if the planter needs light support.
But for the average rudeinsect.com reader with raised beds and a hose bib? Rain Bird first. Then add parts as your garden teaches you what the box didn’t include.
The little parts I’d buy with any garden drip irrigation kit
No matter which kit you choose, I’d keep a few extras on hand:
- Extra 1/4” barbed tees
- Extra goof plugs
- Hose washers
- A tubing cutter or sharp bypass pruners you don’t mind using on plastic
- Extra end caps
- A simple inline filter
- A pressure reducer if your kit doesn’t include or require one separately
- Landscape staples for holding tubing in place
Goof plugs are not optional in our garden. They’re how you fix the hole you made in the wrong place while muttering, “That’ll probably line up.” It won’t.
Landscape staples also help more than you’d think. Tubing has memory, especially when it comes coiled in a kit. It wants to curl back into the shape it lived in inside the box. Lay it in the sun for a bit before installing if you can. Warm tubing behaves better. Cold tubing fights like a garden hose in March.
One more thing: label zones if you have more than one. We use cheap plastic tags wired near the hose splitter. “Beds 1–2.” “Pots.” “Front herbs.” Nothing fancy. In July, when everything is green and tangled, you won’t remember which line goes where.
For a broader watering setup, including where drip makes sense and where a soaker hose is less annoying, see our drip irrigation techniques guide. Drip is great. It is not the answer to every watering problem.
What didn’t work for us
We tried burying 1/4” lines under too much mulch. Bad idea. Not because mulch is bad — mulch is wonderful — but because buried tiny lines are hard to inspect, easy to stab with a trowel, and apparently delicious to small chewing animals.
We tried running one container line across a walkway. Also bad. Even tucked against the edge, it got kicked, dragged, and eventually pulled one fitting loose. If a line crosses where people walk, it needs protection or a different route.
We tried watering all containers and raised beds on the same timer schedule. Nope. The containers wanted more frequent water, the beds wanted deeper water, and the herbs wanted to complain no matter what.
We also tried skipping the flush step after cutting and assembling lines. Don’t. Tiny plastic bits from installation can clog emitters. Open the ends, run water briefly, then cap them. It feels like wasted time until it saves you from diagnosing a dry pepper plant three weeks later.
And — this is the one that gets people — we tried drip without mulch. It still works, but mulch makes the whole system better. The soil stays cooler, moisture spreads more evenly, and the timer doesn’t have to work as hard. Straw, shredded leaves, pine fines, composted wood chips. Use what fits your garden.
My final pick
The best garden drip irrigation kit here for raised beds and mixed backyard vegetable gardens is the Rain Bird GRDNERKIT Drip Irrigation Gardener’s Drip Kit.
I’d pick it because it’s the least boxed-in. You can make a sensible raised-bed layout, tweak it as crops change, and fix or expand it without feeling trapped by the original kit. It still needs careful setup. You still need to check fittings. You still need a timer if you want automatic watering. But it’s the one I’d spend my own money on first for beds.
For container gardeners, I’d go with the Raindrip R560DP Automatic Watering Kit. For balcony gardeners or people who want a contained smart system, the MP1 planter setup is more relevant than a pile of tubing.
Just don’t expect any kit to save a bad layout. Dry-fit it. Run it. Check it. Fix the leaks before you mulch.
That’s the boring part. Also the part that makes it work.
Our Top Picks

Smart Modular Planter with App Control and Automatic Water Cycling (MP1)

Solar System with Panel and Battery(Suitable for MP1)