Rude Insect
raised-bed-gardening

How to Build a Raised Garden Bed 2026

Build a raised bed that lasts — wood vs metal vs stone, right depth for vegetables, cut list, weekend steps, and what to fill it with without overspending on

By Rude Insect Updated July 10, 2026
How to Build a Raised Garden Bed 2026
Disclosure: This post contains affiliate links. If you buy through them, Rude Insect earns a small commission at no extra cost to you. We only recommend products we’d use ourselves.

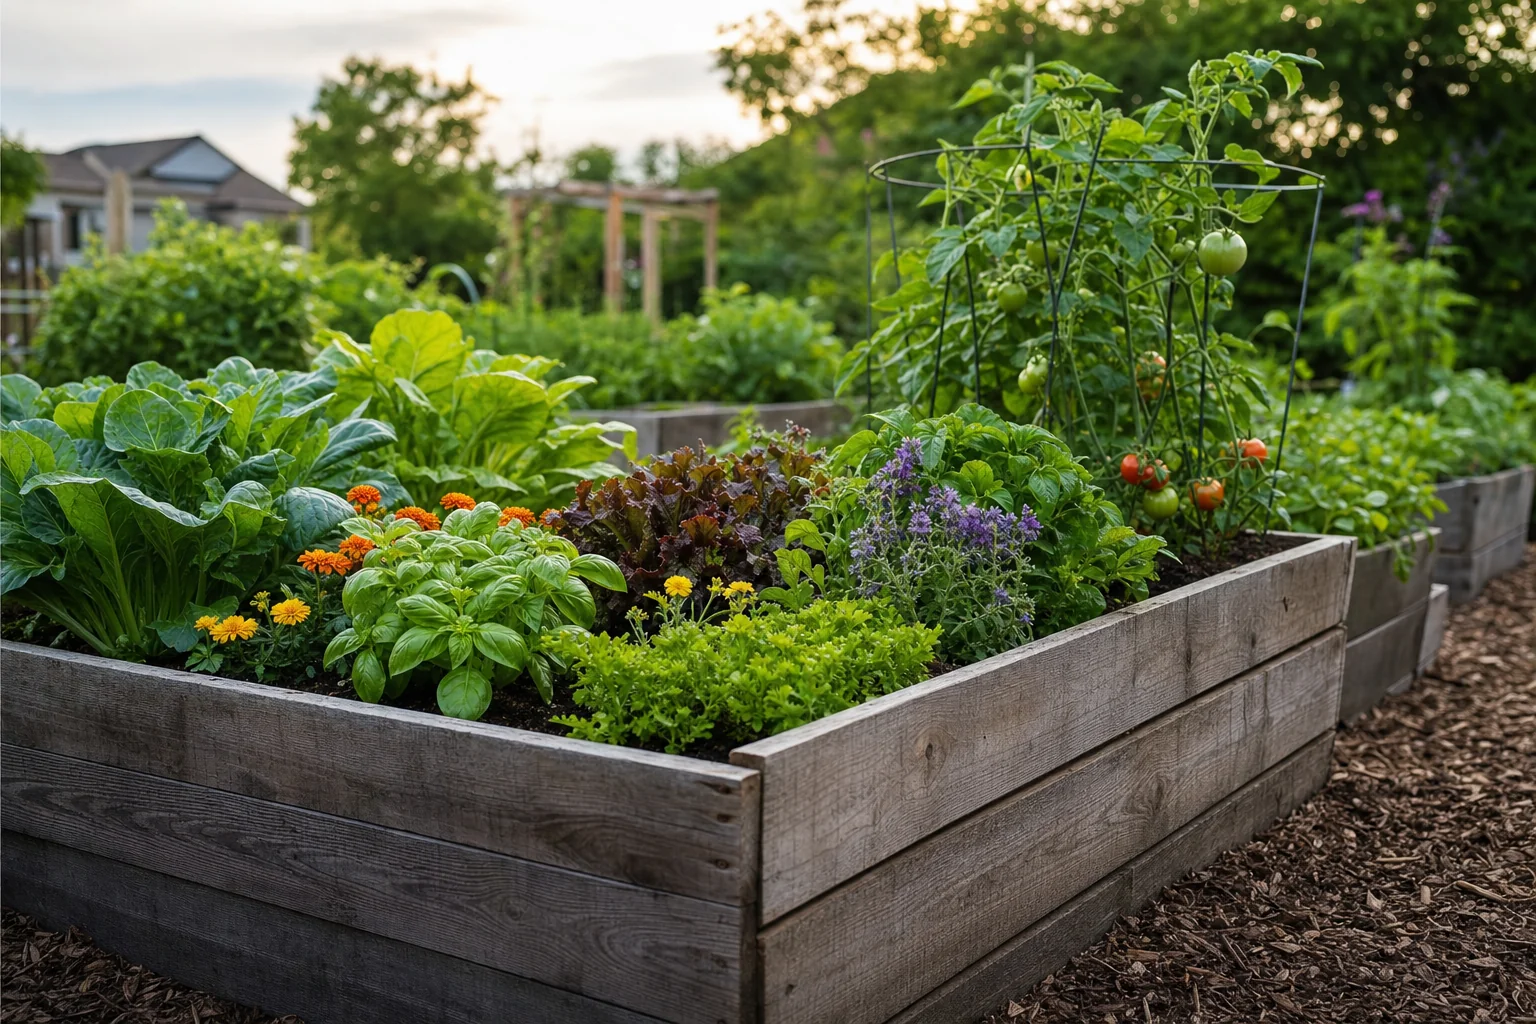
We’ve built raised beds out of cedar, cheap pine, corrugated metal, stacked stone, and one very regrettable batch of contractor “topsoil” that turned into brick by July. So when people ask me how to build a raised garden bed in 2026, I don’t start with Pinterest dimensions. I start with this: build the bed around the way you actually garden, not the way the internet tells you a garden should look. A 4x8 cedar box is lovely. A 17-inch metal bed is easier on your back. Stone lasts forever but eats a weekend and your patience. And soil — soil is where most people overspend or ruin the whole thing.

If you’re putting in your first bed this year, I’d build one simple 4x8 bed, 12 to 17 inches deep, fill it with a sane bulk mix plus compost, and skip the fussy stuff. You can always add irrigation, hoops, trellises, or another bed later. Ask me how I know. Our first year, we tried to do six beds at once. Looked ambitious. Felt terrible. We spent more time moving wheelbarrows than planting tomatoes.

Quick note before we get muddy: some links below are affiliate links. If you buy through them, we may earn a small commission, at no extra cost to you. I’m only mentioning products that fit an actual raised-bed setup — no random garden gadgets stuffed in here for the sake of it.

How to build a raised garden bed that won’t annoy you by August

The most common raised-bed mistake is building the wrong size.

Not the “wrong” size according to some rulebook. The wrong size for your arms, your paths, your sun, your hose, your knees, your budget.

A bed can be beautiful and still be a pain.

We settled on 4 feet wide for most of our kitchen garden because I can reach the middle from either side without stepping in the soil. My husband, who has longer arms and less patience for neatness, could probably work a 5-foot bed. I can’t. Four feet is the comfortable limit for me, especially when the tomatoes have gone feral in late July.

For length, 8 feet is the sweet spot if you’re using standard lumber. Less cutting. Less waste. Easier math. A 4x8 bed gives you 32 square feet, which is enough for a useful amount of lettuce, onions, bush beans, peppers, herbs, or a couple of trellised cucumbers without turning the project into a construction job.

Could you build 3x6? Yes. I like 3-foot-wide beds against fences or walls where you can only reach from one side. Could you build 4x12? Also yes, but long beds need more bracing, and walking around them gets old fast. We have one 4x12 bed. I complain about it every June.

A good beginner size:

  • 4 feet wide
  • 8 feet long
  • 12 inches deep minimum
  • 15 to 17 inches deep if you want happier carrots, fewer watering issues, and less bending

If you want a ready-to-assemble wood option instead of cutting lumber, a Cedar Raised Garden Bed Kit (4x8) is the closest thing to the classic DIY layout. The advantage is obvious: cedar holds up better than cheap softwood, and a kit saves you from wandering the lumber aisle muttering about warped boards. The disadvantage is cost. Kits usually cost more than buying boards yourself, and some use thinner boards than I’d choose if I were building from scratch. Check the current price and board thickness before you click.

If you’d rather avoid wood entirely, the Vego Garden 17in Metal Modular Raised Bed is the kind of metal bed I’d consider for a long-term garden. The 17-inch height is genuinely useful. Less crouching, more root room, better moisture buffering. The downside? Metal beds can feel fussier to assemble, and they don’t have the warm, homemade look of cedar. They also require more fill than a shallow bed, which matters if you’re buying bagged soil.

And yes, the soil volume surprises everyone. Every single person.

Wood vs metal vs stone: what I’d use now

We’ve tried all three in some form.

Wood is still my favorite for a traditional vegetable garden. Metal is probably the most practical if you want modular beds that won’t rot. Stone is gorgeous and permanent, but it’s not the casual Saturday project people pretend it is.

Cedar raised beds

Cedar is the standard for a reason. It’s naturally rot-resistant, easy to cut, and looks right in a vegetable garden. You don’t need special tools beyond a saw, drill/driver, measuring tape, square, and a box of exterior screws.

For a basic 4x8 bed, I like 2x lumber if the budget allows. A bed made with 2x6 boards stacked two high gives you about 11 inches of height. Three high gives you about 16.5 inches. That extra height is lovely, but it uses more lumber and more soil.

We built our first decent cedar beds with 2x6x8 boards and 4x4 corner posts. They were not fancy. No decorative caps. No black hardware. Just square boxes with enough strength to survive freeze-thaw and the occasional kid standing on the edge even though we have asked, repeatedly, not to do that.

Cedar’s advantage: easy to work with, friendly to plants, repairable.

Cedar’s disadvantage: cost and lifespan. It lasts a long time, but not forever. In our Zone 6b garden, sitting through wet springs and humid summers, thinner cedar boards start looking tired faster than people want to admit. Thicker boards buy time.

Pressure-treated lumber

People still argue about this at garden centers like it’s a blood sport.

Modern pressure-treated lumber is not the same as the old arsenic-treated stuff, but plenty of gardeners still prefer not to use it for vegetable beds. I get that. We don’t use it where we grow food. Is that overcautious? Maybe. I’m fine with that.

If you do use pressure-treated wood, read the label and make your own call. Don’t use railroad ties. Don’t use mystery reclaimed boards from an old deck unless you know what they were treated with.

Pine or fir

We built one bed from cheap untreated pine because I was impatient and the cedar was expensive that week.

It worked.

For about two seasons.

By year three the corners were soft, and one board bulged outward after a wet March. If you’re renting, experimenting, or building a temporary herb bed, cheap untreated lumber can make sense. But don’t tell yourself it’s a forever bed. It isn’t.

Metal raised beds

Metal beds have gotten much more common, and honestly, I understand why. They’re tidy, modular, and usually lighter to haul than lumber. The better ones use coated steel panels, rounded edges, and lots of bolts.

The Vego Garden 17in Metal Modular Raised Bed is the metal option I’d point people toward if they want height without carpentry. Its specific advantage is flexibility — modular panels let you choose different shapes depending on your space. The disadvantage is that assembly takes patience. Lots of fasteners. Not hard, just repetitive. Put on a podcast.

Metal also heats differently than wood. I’ve heard people say metal beds cook roots. I haven’t seen that in our climate, but in a hot, exposed Zone 9 yard, I’d pay closer attention. Mulch helps. So does keeping the bed watered.

Stone, block, or brick

Stone beds are beautiful. They also weigh a ton. Literally, depending on how carried away you get.

We have a short herb bed edged in old fieldstone, and I love it. Thyme spills over the edges, bees work the oregano, and it looks like we meant to do something charming instead of just using rocks we dug out of another bed.

But for vegetables? I’d only build stone if you already have stone, a strong back, and no plan to move the garden later.

Concrete blocks work, too. They’re easy to stack, and the holes can hold herbs or flowers. But they take up more space than wood or metal, and they’re not comfortable to lean over. They also look a little like a bunker unless you soften them with plants.

How deep should a raised garden bed be for vegetables?

Here’s the short answer: 12 inches is enough for many vegetables. 15 to 17 inches is better. 24 inches is nice for accessibility but expensive to fill.

We’ve grown lettuce, kale, basil, bush beans, peppers, onions, and determinate tomatoes in beds around 11 inches deep without drama. Carrots did okay, but only the shorter types. ‘Danvers 126’ handled it better than long skinny carrots. Parsnips? Not great. They wanted more room and less clay underneath.

If your raised bed sits on decent native soil and you loosen the ground before filling, plant roots can move down past the bed. That means a 12-inch bed behaves more like a deeper one. But if you’re putting the bed over compacted clay, gravel, old lawn with hardpan, or a patio, depth matters more.

Our usual depth guide:

  • 6 inches: herbs, shallow greens, emergency “I had scrap boards” bed
  • 10 to 12 inches: lettuce, spinach, beans, peas, onions, garlic, peppers, many annual flowers
  • 15 to 17 inches: tomatoes, cucumbers, zucchini, carrots, potatoes, better all-around vegetable depth
  • 24 inches or more: accessibility, deep roots, less bending, high soil cost

If I were building one bed for mixed vegetables, I’d choose 15 to 17 inches. That’s why the 17-inch metal beds are tempting. It’s also why I like three stacked 2x6 boards for cedar if the budget isn’t screaming.

And — important — don’t line the bottom with solid plastic. Drainage matters. A raised bed should drain like a good pot, not hold water like a kiddie pool.

If you’re building on grass, mow it low first. Then loosen the soil with a garden fork if you can. Lay down plain cardboard to smother grass, overlap seams by 6 inches, soak it, and fill on top. Skip glossy cardboard. Remove tape. Worms will handle the rest.

I’ve got more notes on layout, spacing, and crop rotation in the raised bed gardening hub if you’re planning more than one bed.

A simple 4x8 cedar cut list

This is the bed I’d build if someone handed me a free Saturday and said, “Make me one good vegetable bed.”

Finished size: 4 feet wide by 8 feet long by about 16.5 inches tall.

Materials:

  • 9 cedar boards, 2x6x8
  • 1 cedar or untreated 4x4x8 post
  • Exterior-rated screws, 3 inches long
  • Optional: 1x2 or 2x2 scrap for center bracing
  • Optional: hardware cloth for burrowing pests
  • Plain cardboard for the bottom if building over lawn

Cut list:

  • Six 2x6 boards at 8 feet long for the long sides
  • Six 2x6 boards at 45 inches long for the short sides
    Why 45 inches? Because the long boards overlap the ends, and actual 2x lumber is about 1.5 inches thick. Two long-side boards add 3 inches total, giving you a finished outside width close to 48 inches.
  • Four 4x4 posts cut to 16.5 inches for the corners
  • Optional: two center stakes or braces cut around 16 inches

You can also make the short boards 48 inches and screw them to the outside of the long boards. That works. Your bed will be slightly wider. The worms won’t care. I just like a true 4-foot outside width because our paths are measured around it.

Tools:

  • Circular saw or miter saw
  • Drill/driver
  • Tape measure
  • Speed square
  • Level, if you’re fussy
  • Shovel or rake
  • Gloves, unless you enjoy cedar splinters

Pre-drill near board ends if your cedar wants to split. Some boards behave. Some act like they’ve been personally insulted.

If cutting lumber is the part that makes you stall, buy the Cedar Raised Garden Bed Kit (4x8) and be done with it. Advantage: fewer tools, less measuring, faster assembly. Disadvantage: you give up control over board thickness, hardware quality, and exact dimensions. For some people that trade is completely worth it.

How to build a raised garden bed over a weekend

You can do this in one day if everything goes right.

Everything rarely goes right.

Give yourself a weekend. Not because the job is complicated, but because you’ll need to level the spot, chase down one missing drill bit, realize the hose doesn’t reach, and stand there debating whether the bed should move 18 inches to the left. That’s gardening. Construction with second-guessing.

Friday evening: pick the spot and measure twice

Raised beds need sun. For vegetables, aim for 6 to 8 hours of direct sun. More is better for tomatoes, peppers, cucumbers, squash, and beans. Lettuce and spinach tolerate less, especially in hot summers.

Watch the spot for a day if you’re not sure. Shadows from fences, garages, and trees are sneaky. In April, our maple shadows look harmless. By June, they stretch across one corner bed after 3 p.m. and the peppers sulk.

Put the bed where your hose reaches. This sounds too basic to mention until you’ve carried watering cans in July. Never again.

Leave paths wide enough for a wheelbarrow. Thirty inches is workable. Thirty-six inches is better. Wood chips make good paths. So does gravel if you like permanence and weeds growing through gravel, which they absolutely will.

Mark the bed with stakes and string, or just lay the boards on the ground and squint. We do both. The string is more accurate. The squinting is traditional.

Saturday morning: cut and assemble

Cut your boards and posts.

Build the bed upside down or right-side up on a flat-ish surface. I usually assemble one long side first: three 8-foot boards stacked against two corner posts. Keep the top edges flush. Screw each board into each post with two screws.

Then build the other long side.

Stand them up, add the short boards between them, and screw those into the posts. This is easier with two people, but I’ve done it alone with clamps and bad language.

Check for square by measuring diagonally corner to corner. If both diagonal measurements match, you’re square. If they don’t, shove the frame until they’re close. This is a vegetable bed, not cabinetry.

If your bed is longer than 8 feet, add center bracing. Soil pushes outward, especially after heavy rain. Even 4x8 beds can bow a little over time. A simple wood stake screwed at the center of each long side helps.

For metal beds, follow the manufacturer’s assembly order. With something like the Vego Garden 17in Metal Modular Raised Bed, lay out every panel and fastener before starting. The advantage is no sawing and no rot. The disadvantage is that you’ll probably spend more time with bolts than you expect. Tighten loosely at first, then snug everything once the shape is set.

Saturday afternoon: prep the ground

Set the bed in place.

If the ground slopes, level the bed, not necessarily the whole yard. Dig down slightly on the high side rather than propping the low side way up. A bed that sits tight to the soil looks better and holds fill better.

Remove big weeds. Mow grass short. Loosen compacted soil with a fork if you can. If you hit clay, don’t panic. We garden on clay. It’s not a moral failing.

Lay cardboard inside the bed, overlapping the seams. Wet it thoroughly. The cardboard slows grass and weeds while still breaking down. We’ve used this under most of our beds, and it works well enough. Not magic. Bindweed laughs at cardboard. But for lawn grass, it’s solid.

If you have voles, gophers, or other burrowing pests, staple 1/4-inch hardware cloth to the bottom before filling. We didn’t do this in the first beds. Then something tunneled under our beets. Lesson learned. Hardware cloth is annoying to cut, but less annoying than losing half a carrot crop.

Sunday: fill the bed without spending a fortune

This is where budgets go to die.

A 4x8 bed that’s 16.5 inches tall holds roughly 44 cubic feet of material. That’s about 1.6 cubic yards. If you try to fill that entirely with bagged raised-bed mix, you may need 20-plus bags depending on bag size. Painful.

For one bed, bagged mix is convenient. For multiple beds, price bulk delivery.

Our current approach:

  • Bottom layer: small sticks, old leaves, rough compost, spent potting mix, partially broken-down plant material
  • Main fill: bulk screened topsoil/compost blend from a local landscape yard
  • Top 4 to 6 inches: finished compost plus a decent raised-bed or potting mix if needed
  • Final layer after planting: mulch

Do not fill a bed with straight topsoil. We did that year one because a contractor said it was “garden soil.” It compacted into a gray-brown slab. Water ran off. Carrots forked. Lettuce looked offended. We spent the next two seasons fixing it with compost and shredded leaves.

Also don’t fill with straight compost. Too rich, too soft, and it shrinks like crazy.

A sane mix is roughly:

  • 50% mineral soil or screened loam
  • 30% finished compost
  • 20% aeration/organic matter, like aged bark fines, leaf mold, or coarse potting mix

That’s not a laboratory formula. It’s a starting point.

If you’re buying bulk, ask what’s in the mix. “Garden blend” can mean anything. Smell it. Good compost smells earthy. Bad compost smells sour, swampy, or like ammonia. If it steams hot, it may not be finished.

We’ve had better luck buying compost separately and blending it ourselves than trusting mystery “super soil.” Your mileage may vary.

What to fill the bottom with — and what to skip

People love the idea of filling the bottom of a raised bed with logs and branches because it saves soil. That’s basically a simplified hugelkultur approach. It can work. But don’t overdo it in a shallow bed.

In a 17-inch bed, I’m comfortable using 3 to 5 inches of rough organic material at the bottom: small branches, rotted wood, leaves, chopped stems. Then I want real growing mix above that. Plant roots need stable soil, not a hollow pile of brush.

What works for us:

  • Rotted logs, not fresh giant logs
  • Small sticks broken short
  • Dry leaves
  • Old straw that hasn’t been sprayed with herbicide
  • Spent container soil
  • Finished or half-finished compost in the lower layer
  • Shredded paper in small amounts

What I avoid:

  • Meat, dairy, oily kitchen waste
  • Fresh wood chips mixed into the main root zone
  • Black walnut branches
  • Diseased tomato vines
  • Weed seed heads
  • Hay from unknown fields
  • Anything sprayed with persistent herbicide

That last one matters. Herbicide-contaminated hay, straw, manure, or compost can wreck a vegetable bed. Twisted tomato leaves, stunted beans, weird ferny growth — I’ve seen it in neighboring gardens, and it’s miserable. If you’re bringing in manure or hay-based compost, ask questions. If nobody knows, test a pot of beans before spreading it everywhere.

Fresh wood chips are great as path mulch. They’re not great mixed heavily into the top growing layer because they can tie up nitrogen while decomposing. On top? Fine. Mixed into soil? Go easy.

How to build a raised garden bed layout you won’t regret

One raised bed is easy to place. Six beds become a little city.

If you plan to expand, think now.

Keep beds parallel if you can. Leave room for a wheelbarrow. Put the compost pile somewhere you’ll actually use it. Don’t tuck the garden in the far back corner unless you love long walks with a colander full of cherry tomatoes.

Our best layout decision was running the beds north-south so both sides get sun across the day. Our worst was making one path too narrow between two tomato beds. By late summer it becomes a damp tunnel of foliage and mosquitoes. Very scenic. Very annoying.

For a small yard, I’d rather see two well-spaced beds than four cramped ones.

Good spacing:

  • 24 inches minimum between beds if you’re tight on space
  • 30 inches comfortable for walking and kneeling
  • 36 inches better for wheelbarrows
  • 48 inches if accessibility is a priority

Put tall crops where they won’t shade short crops. Trellised cucumbers, pole beans, and indeterminate tomatoes can cast serious shade. In our garden, I put trellises on the north side of beds when possible. That keeps them from shading everything else.

If you’re planning a whole kitchen garden, the raised bed gardening hub has more on spacing, paths, and bed planning. I’d rather you fix the layout on paper than move a filled bed later. Filled beds do not like being moved. Neither do backs.

Irrigation: optional, until July

You can hand-water a new bed. I do it for seedlings because I like checking on them. But once summer hits, drip irrigation is easier and more consistent.

For a 4x8 bed, we’ve used 1/2-inch mainline tubing with 1/4-inch drip lines or soaker-style drip. Some gardeners use 3/8-inch tubing for smaller setups. The exact system matters less than consistency. Deep watering a few times a week beats sprinkling the surface every afternoon.

Mulch after plants are established. Shredded leaves, straw, grass clippings from untreated lawns, or fine wood chips all work. Mulch keeps soil from crusting and reduces watering. Bare raised-bed soil dries faster than in-ground soil. That’s just the deal.

There are also more automated options now, and some actually make sense if you travel or forget to water containers. The Smart Modular Planter with App Control and Automatic Water Cycling (MP1) is not a traditional raised bed, but I can see it fitting a patio grower who wants a controlled planter system for greens, herbs, or compact crops. Its advantage is built-in automation — app control and automatic water cycling are right in the product name, and that solves a real problem for people who miss watering days. The disadvantage is that it’s a contained system, not a big soil bed. You won’t be growing a sprawling pumpkin patch in it. See current price.

The matching Solar System with Panel and Battery(Suitable for MP1) is interesting if the planter sits away from an outlet. Advantage: it can support the MP1 setup without needing a convenient plug nearby. Disadvantage: solar gear adds cost and another component to manage. If your planter is on a shaded porch, think carefully before counting on solar. See current price.

The LED Growing Light system (Suitable for MP1) makes more sense indoors, in a garage seed-starting corner, or for a low-light patio setup. Advantage: it helps when sunlight isn’t enough. Disadvantage: it’s another powered accessory, and outdoor vegetable beds in full sun don’t need it. See current price.

Would I use the MP1 instead of building a 4x8 raised bed? No. Different job. But for renters, balconies, herbs near the kitchen, or someone who wants less guesswork with watering, it’s worth comparing against a conventional planter.

If you want the cleanest answer on how to build a raised garden bed this year, here’s my pick:

Build a 4x8 cedar bed, about 16.5 inches deep, using 2x6 cedar boards stacked three high with 4x4 corner posts. Fill it with a bulk loam-compost blend, improve the top with finished compost, mulch it, and add drip irrigation before the first heat wave.

That’s the bed I’d build for most homeowners.

Why cedar over metal? Because it’s easier to modify. You can screw trellises to it, add hoops, repair a board, attach row cover clamps, or cut it down later. It looks good without trying too hard. And if you build it yourself, you control the materials.

Why not stone? Too much work for a first vegetable bed.

Why not cheap pine? Fine for temporary beds, not my pick for a bed that’s supposed to last.

Why not a kit? A kit is a good choice if cutting lumber is the barrier. I’d rather see you buy the Cedar Raised Garden Bed Kit (4x8) and plant the bed than spend three months “planning” a DIY build you never start. But if you have tools, the DIY cedar version is sturdier and more flexible.

Why not metal? I do like the Vego Garden 17in Metal Modular Raised Bed, especially for people who want height and modular shapes. If rot is your biggest concern, choose metal. But for our main kitchen garden, I still prefer wood.

The big thing is not the material. It’s follow-through.

A raised bed with decent soil, steady water, and compost every year will outgrow a fancy bed filled badly. Every time.

Planting the first season

Don’t pack the bed like a seed catalog photo. Those photos lie by omission. They don’t show August mildew, tomato hornworms, or the way zucchini leaves become dinner plates.

For a first 4x8 bed, try something like this:

  • North side: trellis with cucumbers or pole beans
  • Middle: 2 pepper plants, basil, parsley
  • One end: lettuce or spinach in spring, then bush beans
  • Other end: carrots, onions, or beets
  • Corners: marigolds, nasturtiums, thyme, or calendula

Or go tomato-heavy:

  • 2 indeterminate tomatoes on a strong trellis or cages
  • Basil between them
  • Lettuce in spring before tomatoes shade the bed
  • Carrots or onions along the edges
  • Flowers for pollinators and because gardens should make you happy

I wouldn’t put zucchini in a 4x8 bed unless you’re ready to give it half the bed. In 2024, aphids destroyed our zucchini early, which was rude, but before that the plants had already swallowed the path. Zucchini does not understand boundaries.

Feed the bed gently. Compost at planting. A balanced organic fertilizer if your soil test or plant growth suggests it. Don’t dump every amendment you saw on social media into the bed. More inputs do not automatically mean better soil.

If you can, get a soil test after the first season. Not glamorous. Very useful. Our phosphorus was already high one year, so skipping bone meal saved money and prevented imbalance.

Maintenance that actually matters

Raised beds aren’t maintenance-free. They’re just easier to manage.

Every year, the soil level drops. Compost breaks down. Roots decompose. Worms do worm things. Top up with compost in spring, usually 1 to 2 inches. If the bed sank a lot, add more loam or raised-bed mix too.

Keep mulch on the surface during hot weather. Pull it back a little for direct seeding, then move it back once seedlings are up.

Check wooden beds each spring:

  • Soft corners
  • Bowing sides
  • Loose screws
  • Rot at ground contact
  • Ant nests, which we get more often in dry years

Check metal beds for:

  • Loose fasteners
  • Sharp exposed edges
  • Soil settling away from sides
  • Drainage issues around the base

Rotate crops if you can, but don’t make yourself crazy in a tiny garden. I avoid planting tomatoes in the exact same bed year after year if possible. When I can’t rotate much, I remove diseased plant debris, add compost, mulch well, and choose resistant varieties where I can.

And write things down. Just a few notes. “Peppers hated Bed 3.” “Garlic harvest June 28.” “Do not plant four cherry tomatoes again, you absolute fool.” Future you will appreciate it.

Raised-bed mistakes we made so you can skip them

We filled a bed with bad topsoil. Disaster. It compacted hard, drained poorly, and took years to fix.

We built one bed too wide. I stepped into it constantly, which defeated the whole point of raised beds.

We skipped hardware cloth in a spot with tunneling pests. Lost root crops.

We used flimsy corner stakes once. The sides bowed after spring rain.

We planted mint in a raised bed without a container. Mint is not a plant. Mint is a campaign.

We put the first compost pile too far from the beds. Sounds minor. It meant we used it less.

We waited too long to mulch. Soil crusted, seedlings struggled, watering took longer.

We built before checking hose reach. Dumb. Classic, but dumb.

None of these ruined the garden. They just made extra work. Raised beds are forgiving if you fix problems early.

Our Top Picks

Smart Modular Planter with App Control and Automatic Water Cycling (MP1)

Smart Modular Planter with App Control and Automatic Water Cycling (MP1)

Check Price Check Price →
Solar System with Panel and Battery(Suitable for MP1)

Solar System with Panel and Battery(Suitable for MP1)

Check Price Check Price →
LED Growing Light system (Suitable for MP1)

LED Growing Light system (Suitable for MP1)

Check Price Check Price →

Frequently Asked Questions

What is the cheapest way to build a raised garden bed?
The cheapest decent way is untreated pine or fir boards, simple screws, cardboard over grass, and a bulk soil-compost blend instead of bagged mix. It won’t last as long as cedar or metal, but it gets you growing. If you want a bed that lasts longer, cedar costs more upfront but is the better buy.
How deep should a raised garden bed be for tomatoes?
I’d give tomatoes at least 12 inches, but 15 to 17 inches is better. Tomatoes can root deeply if the soil below is loosened, so a 12-inch bed over decent ground can work. If the bed is over compacted clay, gravel, or patio, go deeper.
Should I put rocks in the bottom of a raised bed?
No, not for drainage. Rocks don’t magically improve drainage in a raised bed, and they take up root space. Use branches, leaves, or rough compost in the very bottom if you’re trying to reduce soil cost, then put a proper growing mix above it.
Is wood or metal better for raised garden beds?
For most DIY vegetable gardens, I still pick cedar wood because it’s easy to build, repair, and modify. Metal is better if you want a modular bed that won’t rot, and the 17-inch metal beds are great for depth. Stone lasts longest, but it’s heavy and slow to build.
Can I fill a raised bed with just compost?
I wouldn’t. Straight compost shrinks, can hold too much moisture, and may be too rich depending on what’s in it. Mix compost with mineral soil or screened loam and some aeration material. A balanced bed grows better than a fluffy pile of compost.
Do I need to remove grass before building a raised bed?
Not usually. Mow it short, loosen the ground if you can, lay down overlapping plain cardboard, soak it, and fill the bed. That works well for regular lawn grass. If you have aggressive perennial weeds like bindweed, remove as much as possible first and expect to keep fighting it.