How to Set Up a Raised Bed in 2026: Tested Kits, Soil Fill, and Irrigation Picks
Hands-on setup guide comparing raised bed kits, soil mixes, liners, and watering add-ons for a reliable home garden build.
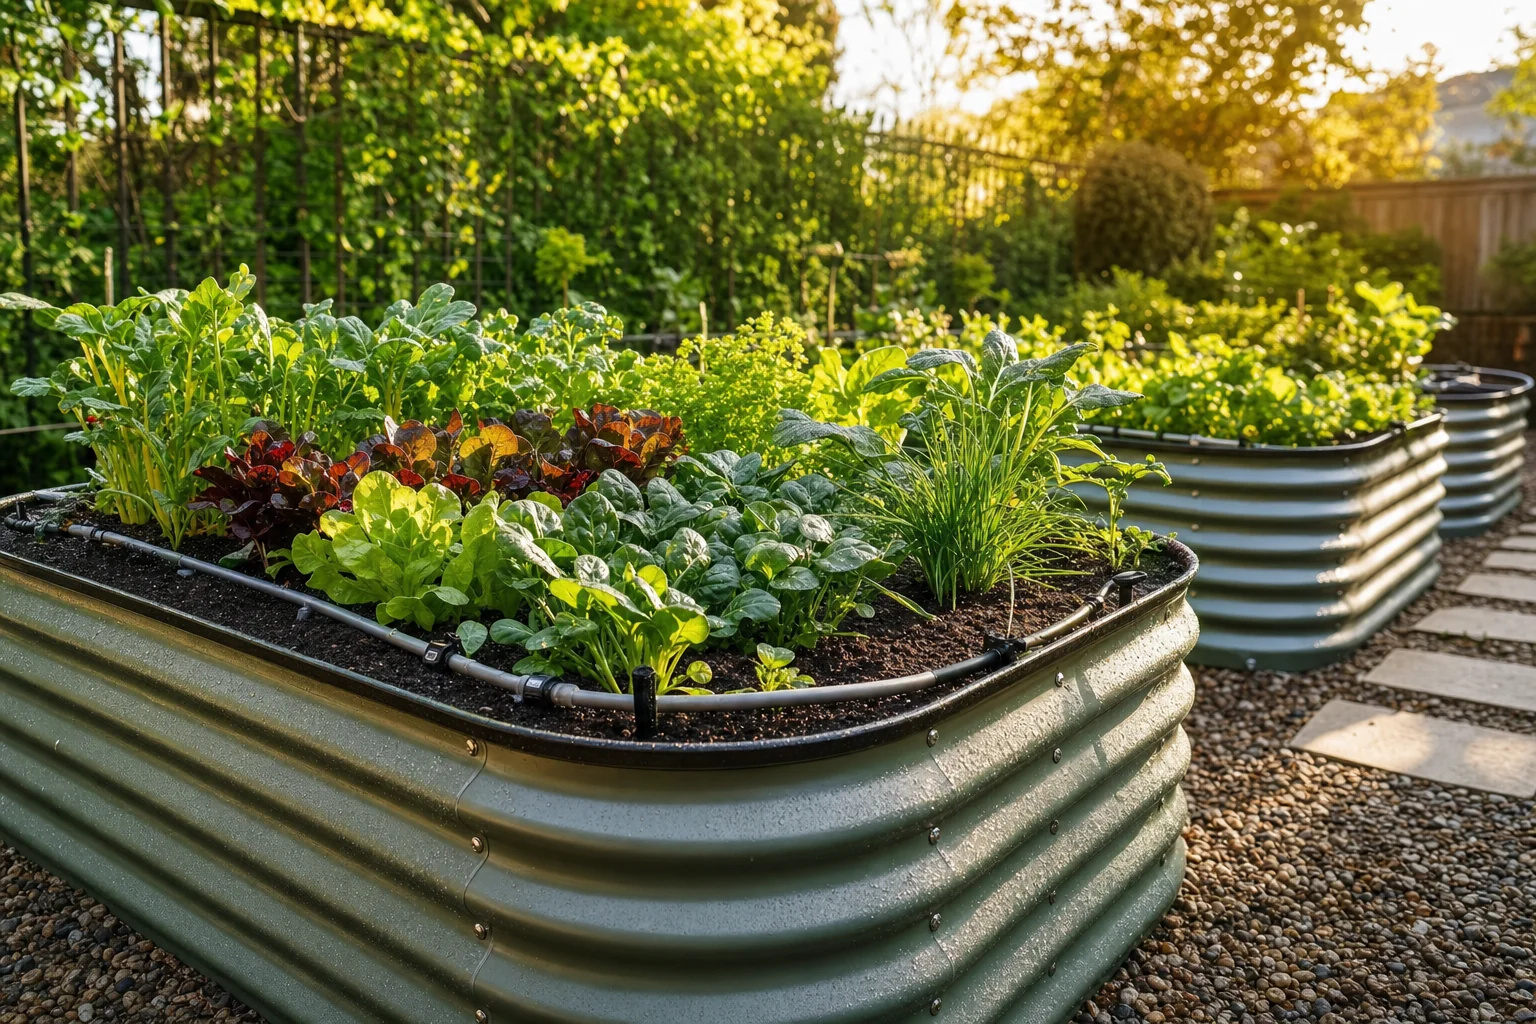
The first time we learned how to set up a raised bed, we did almost everything the hard way. We put it in the wrong spot, filled it with cheap contractor “topsoil,” skipped leveling because “close enough,” and then acted surprised when the west end stayed soggy and the east end turned into brick. That was years ago. We’re up to 14 kitchen-garden beds now in Zone 6b, and the beds that still make me happy all have the same boring things in common: level base, decent depth, mixed soil instead of mystery dirt, and water that shows up even when we’re busy.
How to set up a raised bed without regretting it by June
Start with the spot. Not the kit. Not the soil. The spot.
For vegetables, I want 6+ hours of sun, and 8 is better for tomatoes, peppers, cucumbers, squash, and anything else that sulks when shaded by the garage. If you’re growing lettuce, spinach, parsley, cilantro, and scallions, you can get away with less. But if this is your main food bed, don’t tuck it behind the lilac because it “looks nice there.” Ask me how I know.
We had one 4x8 bed along the back fence that got blasted with morning sun and shaded after 2 p.m. It was beautiful in April. By August, the tomatoes looked like they’d given up on life. The lettuce did great, though. So now that bed is greens and herbs, not fruiting crops.
Here’s my quick site check before I build:
- Watch the sun for a full day if you can. Even better, check it in spring and again in summer.
- Stay away from roof drip lines unless you’re catching and directing that water on purpose.
- Don’t build where your feet sink after rain.
- Leave enough room to walk around the bed with a wheelbarrow. Thirty inches is okay. Thirty-six is nicer.
- Put the bed near water. Not “I can drag a hose 90 feet if I have to” near. Actually near.
That last one matters more than people think. A raised bed dries out faster than in-ground soil, especially a metal one in a hot week. If watering is annoying, you’ll skip it. Then the carrots get woody and the basil bolts and you’ll blame the seed packet. Been there.
If you’re still deciding on the actual bed style, I’d also read our broader raised bed comparison here: best raised garden beds for 2026. That piece is more kit-focused. This one is the whole build — bed, fill, liner, water, and the little mistakes that cost you a Saturday.
The raised bed kit I’d buy first in 2026
For a first serious vegetable bed, I’d pick the Vego Garden 17” Tall 9-in-1 Modular Metal Raised Garden Bed Kit before I’d build another cheap wood box from whatever boards are on sale.
Not because wood is bad. We still have wood beds. Cedar smells wonderful, looks warm, and doesn’t turn the garden into a row of shiny troughs. But decent cedar costs real money now, and bargain pine rots right where it touches damp soil. Our first untreated pine bed looked fine for two seasons. By year four, I could push a hori hori through the corner joint like cake.
The Vego kit’s big advantage is right in the name: 17 inches tall and modular metal. That height is useful. Not “never bend again” useful, because you’re still gardening, but deep enough for a better soil profile than those shallow 8-inch boxes that dry out by lunch in July. The modular part is handy if your space is weird. Most yards are weird. Gates, downspouts, slopes, dog paths, kid paths, the spot where the trash cans have to go — nothing is as clean as a product photo.
The downside? Assembly takes patience. Metal panel kits are not a five-minute job, and the first one always takes longest. Wear gloves. Lay the parts out. Don’t tighten every bolt fully until you know everything lines up. We learned that one after building half a bed slightly racked, then taking it apart while muttering words not fit for the seed-starting room.
Also, metal beds are less forgiving on an uneven base. A wood bed has some chunkiness to it. A modular metal bed wants the ground prepped properly.
My quick verdict on the Vego 17-inch kit
I’d use it for the main vegetable bed, especially if you want something that looks tidy and should outlast cheap lumber. Specific advantage: the 17-inch height gives you room for a real soil build, not just a skim of compost over hard ground. Specific disadvantage: assembly and leveling matter more than people expect.
If you’re building one bed and want the least fuss over the next few years, that’s my pick.
How to set up a raised bed base so it doesn’t shift
I don’t pour concrete. I don’t use landscape fabric under vegetable beds anymore either, unless I’m dealing with a very specific weed problem around the outside paths. Under the bed itself, fabric usually becomes a weird plastic lasagna layer that roots hate and worms avoid.
For most beds, we do this:
- Mow or cut weeds as low as possible.
- Remove thick perennial roots if we can. Dock, bindweed, quackgrass — don’t just bury those and hope.
- Lay down plain cardboard, overlapping seams by 6 inches.
- Wet the cardboard so it settles.
- Set the bed frame.
- Level the frame.
- Fill.
Cardboard is not magic. Bindweed laughs at cardboard if you give it half a chance. But for lawn conversion, it works well enough, breaks down, and doesn’t leave plastic strings in the soil five years later.
Leveling is the unglamorous part that pays you back every single rainstorm. I use a 4-foot level and a scrap 2x4. Nothing fancy. Scrape high spots down. Pack low spots with soil or fine gravel if you need a little adjustment under the edge. Don’t build a whole bed on a loose pile of mulch and expect it to stay put.
And check corner-to-corner, not just side-to-side. Our third metal bed was technically level on the long sides but twisted diagonally. Didn’t notice until watering made one corner pool. Annoying. Fixable, but annoying.
For paths, I like cardboard plus wood chips. Not dyed mulch. Not pea gravel unless you enjoy picking stones out of your beds forever. Arborist chips are best if you can get them. We’ve paid $0 through ChipDrop and we’ve also waited forever, so don’t plan your whole weekend around a maybe.
Liners, gopher wire, and other “do I really need this?” stuff
A liner depends on what the bed is made of and what problem you’re solving.
For metal kits, I don’t line the sides with plastic. The bed is already designed to hold soil. Plastic against the inside can trap moisture in odd ways, slump down, and become one more thing to fail. If you’re using treated wood and you’re uncomfortable with soil contact, that’s a different conversation. For cedar or metal, I skip side liners.
Bottom liner? Usually no.
Hardware cloth? Sometimes yes.
If you have voles, gophers, or groundhogs that tunnel like tiny criminals, put 1/2-inch hardware cloth under the bed before filling. Not chicken wire. Chicken wire is for keeping chickens somewhere they don’t want to stay. It rusts, bends, and larger gaps let small pests squeeze through.
Use hardware cloth bigger than the bed footprint, set the bed on top, and bend the edges up slightly inside before filling. Wear gloves unless you want little wire cuts all over your hands. I’ve done that. It’s dumb.
If you don’t have burrowing pests, skip it. Spend that money on compost or drip irrigation.
Raised bed soil: what actually worked for us
The biggest raised bed failure we ever had was soil. Year one, we ordered “screened topsoil” from a local contractor because it was cheap by the yard. It looked dark in the pile. That fooled us.
Once it rained, it packed into a heavy slab. The carrots forked. The onions stalled. The tomatoes survived because tomatoes are weeds with better PR, but even they weren’t impressive. We spent the next two seasons fixing that bed with compost, shredded leaves, and coarse material.
A raised bed needs structure, drainage, and biology. Not just “dirt.”
For a new 17-inch-tall bed, I do not fill the entire thing with bagged potting mix. That gets expensive fast, and some bagged mixes can dry out in a strange, peat-heavy way if they’re not blended with compost and mineral soil. I also don’t fill the bottom with logs unless the bed is very deep and I know what I’m doing. Hugelkultur has its place. A first vegetable bed that you need to plant next week is not where I’d get cute.
Our basic fill looks like this:
- Bottom layer: small sticks, old leaves, rough compost, and native soil loosened with a fork if the ground isn’t contaminated or awful.
- Middle layer: bulk compost blended with decent screened soil.
- Top 6 to 8 inches: the best stuff — compost, raised bed mix, and any amendments based on what we’re growing.
I like having the nicest material where young roots start. You don’t need luxury soil 17 inches deep. But you do need the top layer to hold moisture without turning gummy.
Where Miracle-Gro Performance Organics Raised Bed Mix fits
The Miracle-Gro Performance Organics Raised Bed Mix is useful when you need a bagged raised bed mix that’s easy to find and consistent enough for topping off, smaller beds, or the upper planting layer.
Specific advantage: it’s convenient. If you’re setting up one bed and don’t have a pickup truck, bagged mix saves you from begging a neighbor to help shovel compost out of a tarp in the driveway. It’s also handy for refreshing settled beds in spring. We top up beds every year because organic matter disappears. Worms, microbes, rain, harvesting — the soil level drops. Always.
Specific disadvantage: I wouldn’t fill a large 17-inch bed entirely with bagged mix unless you’ve priced it out and made peace with the receipt. Check the current price through the link above. Bagged soil costs add up in a way that feels rude when you’re standing in the garden center doing mental math with muddy shoes.
If I were building one Vego 17-inch bed, I’d use bulk compost/soil for most of the volume, then use a product like Miracle-Gro Performance Organics Raised Bed Mix in the top planting zone or as a spring refresh. That’s the sweet spot.
How much soil do you need?
Measure the bed after you choose the configuration. Don’t guess from the box.
Soil volume is:
Length × width × depth = cubic feet
Use feet, not inches. So a bed that’s 4 feet wide, 8 feet long, and filled 1.25 feet deep needs:
4 × 8 × 1.25 = 40 cubic feet
There are 27 cubic feet in a cubic yard, so that’s about 1.5 cubic yards.
That’s before settling. And soil settles. A lot. If you fill a bed in March, it may drop an inch or three by June, especially if there’s fluffy compost in the mix. I’d rather underfill by a hair and top off after the first few rains than mound it like a grave and watch half of it wash into the path.
One practical trick: fill the bed, water it deeply, wait a day, then top it off. Dry bagged mix lies to you. It looks full until water pulls it down.
Irrigation: the part I used to skip
For years we hand-watered with a hose and a Dramm wand. Still love that wand. Hand-watering is how you notice flea beetles on eggplant, aphids under kale leaves, and the first cucumber beetle pretending it’s not there.
But hand-watering as the only system? Not anymore.
In 2024, aphids wrecked our zucchini early, then we had a stretch where life got busy and the new bean bed missed two waterings in hot weather. The plants recovered, sort of, but yields were weaker. Stress stacks up. Bugs love stressed plants.
For raised beds, I like drip or soaker-style irrigation more than sprinklers. Wet leaves invite disease, and sprinklers waste water on paths. A simple bed can run on 1/2-inch mainline with 1/4-inch drip lines or emitter tubing, depending on layout. If you’re doing one bed, you don’t need a farm-grade system. You do need a filter, pressure reducer if your setup calls for it, and a timer if you’re forgetful.
And yes, I know timers feel fussy. Then you go away for a weekend in July and come home to peppers that look like green raisins. Suddenly the timer seems less fussy.
My basic raised bed watering layout
For a rectangular vegetable bed, I run lines lengthwise, spaced about 9 to 12 inches apart for most crops. Closer for carrots and salad greens. Wider for tomatoes and peppers if each plant has emitters nearby.
I pin the tubing down with landscape staples or homemade wire pins. Otherwise it snakes around the bed after a few warm days and looks like a black spaghetti accident.
Mulch over the lines once seedlings are up. Straw, shredded leaves, grass clippings that haven’t gone to seed, or fine wood chips around perennials. For annual vegetable beds, straw and shredded leaves are easiest to move aside.
Don’t bury drip lines deep. Future you will stab them with a trowel. Future you will be irritated.
How to set up a raised bed planting plan that doesn’t turn into chaos
A brand-new raised bed is tempting. You want tomatoes, basil, cucumbers, carrots, lettuce, peppers, marigolds, beans, onions, and maybe one adorable pumpkin.
Don’t plant the pumpkin.
One 17-inch raised bed can grow a lot, but spacing still matters. Crowding feels productive in May and punishing in August. Airflow disappears. Powdery mildew shows up. You can’t reach the center without crushing something. The zucchini becomes a landlord.
For a first bed, I’d pick one of these plans:
Salsa bed
- 2 tomatoes with strong stakes or cages
- 2 peppers
- Basil along the front edge
- Scallions or cilantro in gaps early
- Marigolds if you like them, but don’t expect them to solve every pest problem
Salad bed
- Lettuce in blocks
- Spinach or arugula in spring and fall
- Radishes tucked between slower crops
- Carrots in one dedicated section
- Parsley on the edge
Easy dinner bed
- Bush beans
- Swiss chard
- A compact cucumber on a trellis
- Basil
- A row of carrots or beets
The boring advice is to plant fewer crops well. The fun mistake is planting everything. We still do the fun mistake sometimes, but not in the beds we rely on.
If you’re comparing bed sizes and shapes before committing, this guide pairs well with our kit roundup: best raised garden beds for 2026. I’d rather see someone buy one good bed and grow it properly than buy four flimsy boxes and fill them with tired dirt.
Trellises, stakes, and the stuff you should install early
Put supports in before plants need them. That sounds obvious. It took us several seasons to stop learning it.
Tomato cages shoved into a full tomato in July are a comedy routine. Same with cucumber trellises installed after vines have already sprawled sideways through the basil. You’ll break stems, swear a little, and promise to do better next year.
For raised beds, I like:
- T-posts and cattle panel for cucumbers, pole beans, and peas
- Sturdy tomato cages for determinate tomatoes
- Florida weave with stakes and twine for rows of tomatoes
- Bamboo only for light crops; it’s not enough for a loaded tomato unless you build a real structure
Metal beds don’t give you the same easy screw-in options as wood beds, so plan freestanding supports or supports anchored outside the bed. A cattle panel arched between two beds is excellent if you have the space. It also makes you feel unreasonably proud when cucumbers hang down through the arch.
Feeding the bed after the first flush
Fresh raised bed soil can carry plants for a while, but heavy feeders need food. Tomatoes, peppers, cucumbers, squash, cabbage — they all ask for more than lettuce does.
I don’t dump random fertilizer on everything. We’ve done soil tests some years and skipped them other years, which is not saintly but honest. Compost is our baseline. Then we feed based on the crop.
A few habits that helped:
- Add compost every spring, even if the bed looks fine.
- Mulch before summer heat.
- Don’t overdo nitrogen on tomatoes unless you want leafy monsters with fewer fruit.
- Side-dress heavy feeders once they start growing hard.
- Pull finished crops and replant quickly so the bed doesn’t sit empty and weedy.
By late summer, a raised bed can look tired. That doesn’t mean it failed. It’s been working. We top-dress with compost, cut out diseased foliage, and replant open space with fall crops — kale, radishes, lettuce, spinach, or cover crop if we’re done with that bed for the season.
What didn’t work in our raised beds
Cheap soil was the big one. Already covered that, but it deserves another little glare.
Landscape fabric under the whole bed also didn’t work for us. It slowed roots, trapped weird pockets of moisture, and turned into trash later. I’ll use cardboard. I’ll use hardware cloth for burrowers. I won’t use fabric as a default under vegetable beds.
Tiny shallow beds were another regret. Those 6- to 8-inch decorative boxes look cute on a patio, and they’re fine for herbs or shallow greens, but they’re not my pick for a main vegetable garden. Too little buffer. Hot days hit harder. Miss one watering and the plants know.
We also tried filling the bottom of a bed with huge logs once because the internet made it sound like woodland magic. That bed sank unevenly for two years. Maybe we did it wrong. Maybe the logs were too large. Maybe our climate and timeline didn’t match the method. Take this with a grain of salt. But for a reliable home garden build, I prefer a less dramatic fill.
My 2026 raised bed setup recommendation
If a friend asked me how to set up a raised bed this weekend and wanted a reliable answer, I’d tell them this:
Buy the Vego Garden 17” Tall 9-in-1 Modular Metal Raised Garden Bed Kit if they want a clean, durable main vegetable bed and don’t mind careful assembly. Set it in the sun, level it properly, use cardboard underneath unless they need hardware cloth, and fill it with a bulk compost/soil blend plus a better top layer.
Use Miracle-Gro Performance Organics Raised Bed Mix for the top planting zone, smaller builds, or annual top-offs — not necessarily as the full-volume fill for a big bed unless the current price makes sense for your budget.
Install drip or soaker irrigation early. Mulch after planting. Support tomatoes and cucumbers before they flop. Plant fewer things than you want to.
That’s the version that works. Not the fanciest. Not the cheapest. The one I’d actually want to maintain in August when the mosquitoes are out and dinner still needs picking.
For more kit comparisons before you choose a frame, use our larger raised-bed guide here: best raised garden beds for 2026.